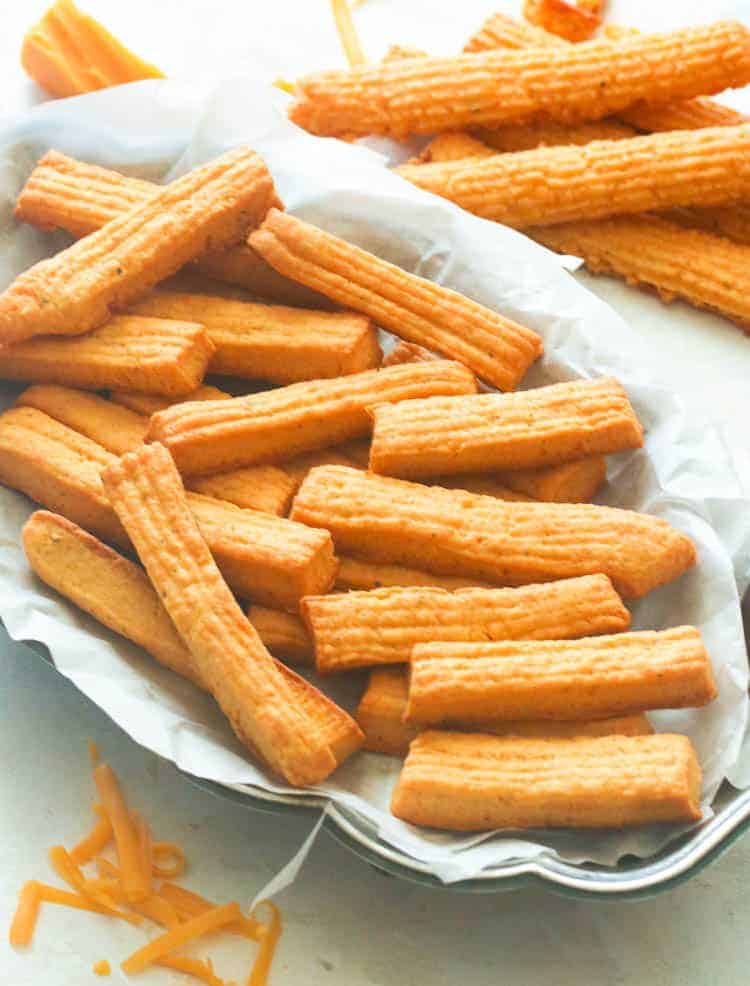
Cheese Straws – These light and crispy treats take finger food to the next level! Cheesy, buttery, crunchy snacks are simply irresistible! And they’re quick and easy to make, so you can prepare dozens at a time. Even better, they go perfectly in any care package for family and friends!
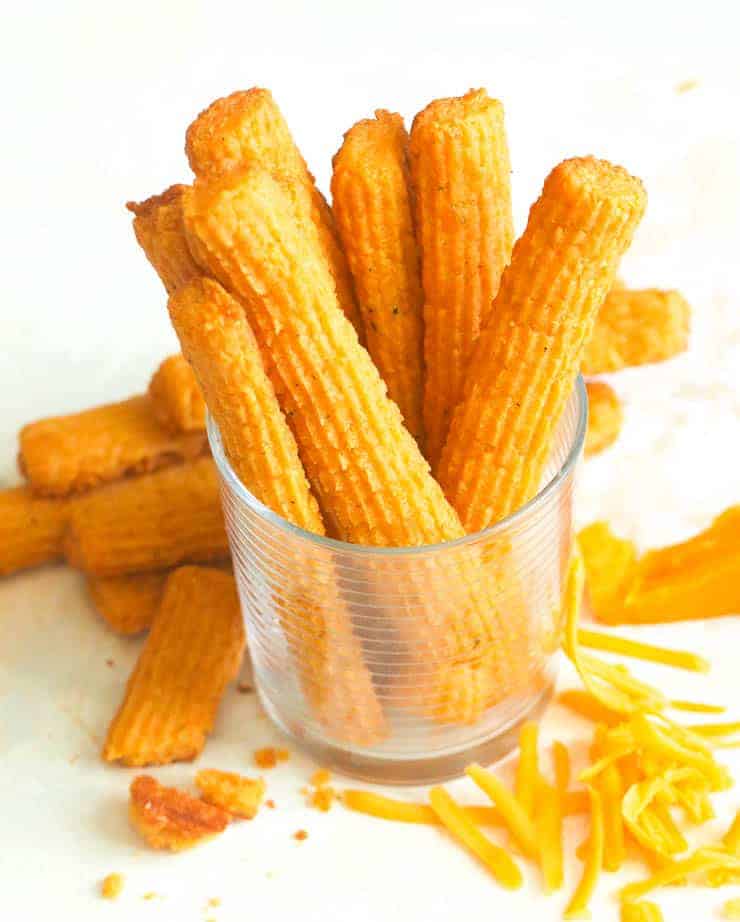
During the quarantine, I missed my family and friends so much that I would send them care packages to cheer them up and tell them how much I loved them. And this cheese straw recipe was the perfect treat to include because it’s easy, cheap, and portable.
But now that we’re back to parties and gatherings, these babies are still hands-down the most requested snack and appetizer. And I can’t blame them because they are oddly addicting. Imagine chatting with loved ones while nibbling on a classic Southern cheese straw. Oh yes, let the good times roll!
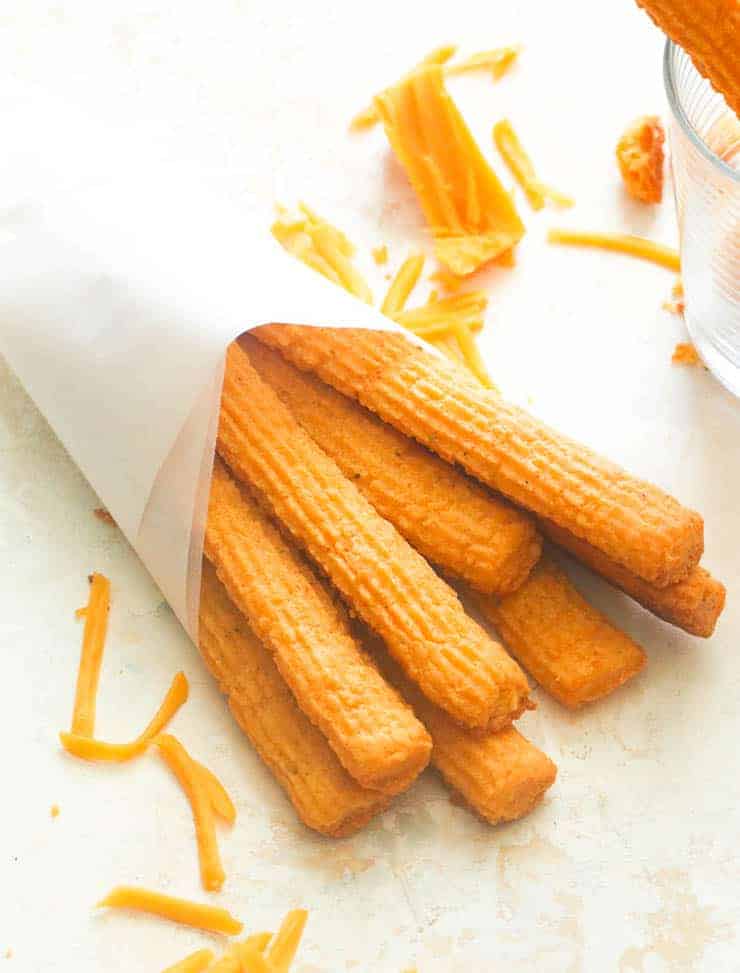
What Are Cheese Straws?
These addictive cheese straws are enjoyed worldwide as appetizers or snacks. They’re made of buttery dough with cheese, seasonings, and flour and then baked into thin strips. They resemble traditional English biscuits but were reinvented in the South. Talk about pure comfort food.
Are Cheese Straws Southern?
They absolutely are! Just because they were invented in England doesn’t mean they’re not also Southern. The South’s high heat and humidity can destroy cheese fast. So a good cheese straw recipe was mamaw’s way of making sure cheese didn’t go bad. And, of course, she ramped it up with some heat from cayenne for an incredibly delicious treat.
Recipe Ingredients
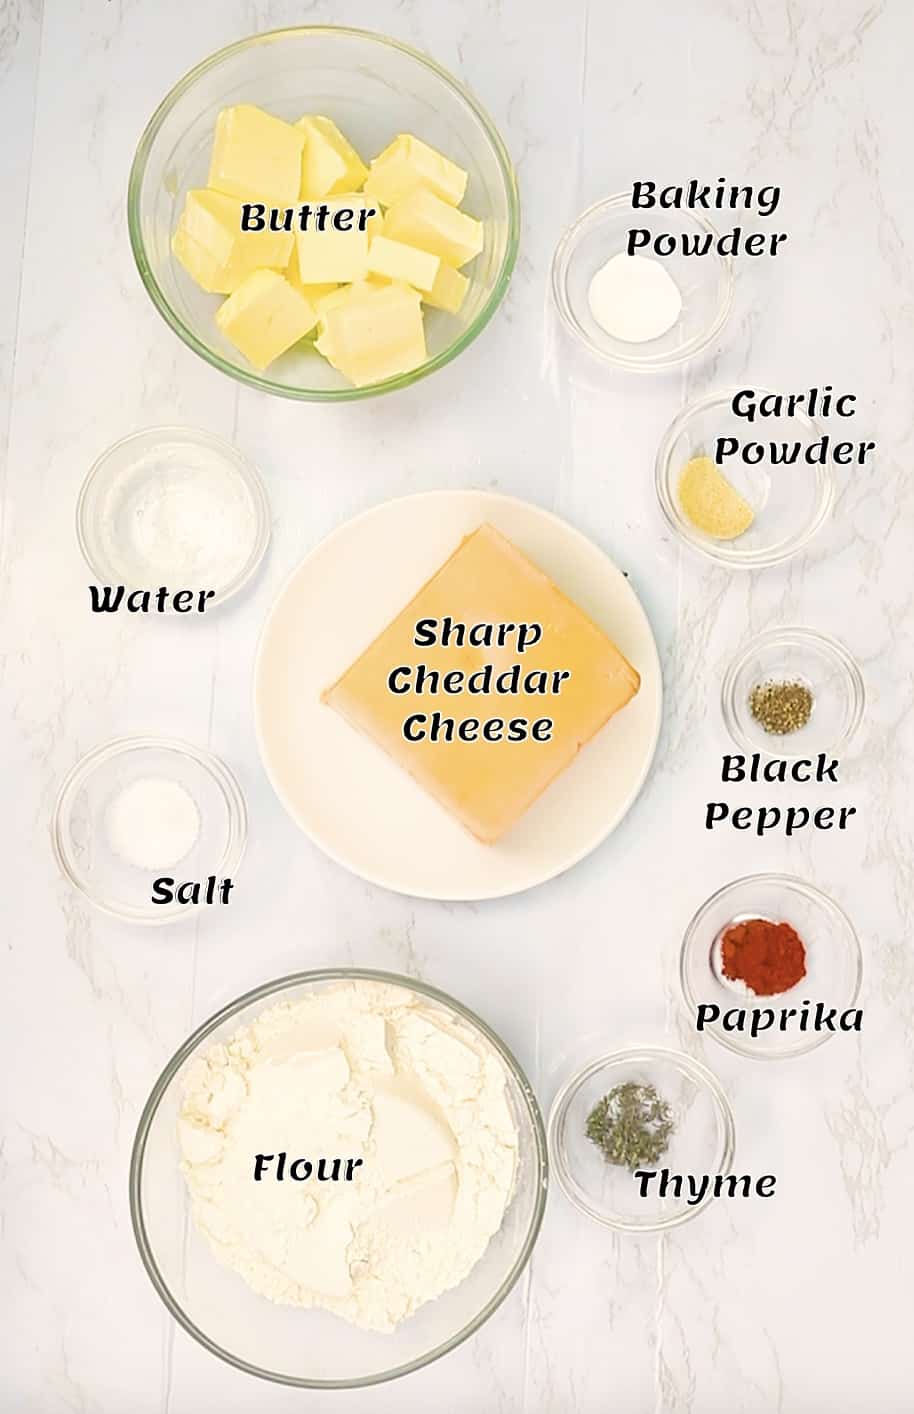
These Southern cheese straws may be small, but they are BIG in flavor. As you can see from this ingredient list:
- Dry Ingredients – All-purpose flour and butter give shape and structure to these easy cheesy strips. And the baking powder keeps their texture light and airy.
- Sharp Cheddar Cheese – Of course, your cheese straw recipe wouldn’t be cheese straws without the cheese.😉 However, you can use whatever cheese you have on hand if you don’t have cheddar.
- Butter – Did I hear butter? And did someone say it’s actually a healthy fat? Oh yeah! If you only have salted butter, simply reduce the amount of salt in the recipe.
- Seasonings – Garlic is a must-have savory flavor enhancer for this recipe. And you can’t go wrong with adding a classic kick of heat and a touch of Southern flavors from cayenne and paprika. Moreover, I couldn’t resist adding thyme for a fresh, earthy flavor.
How to Make Cheese Straws
Make the Dough
- Prep – Line a baking sheet with parchment paper. Set aside.
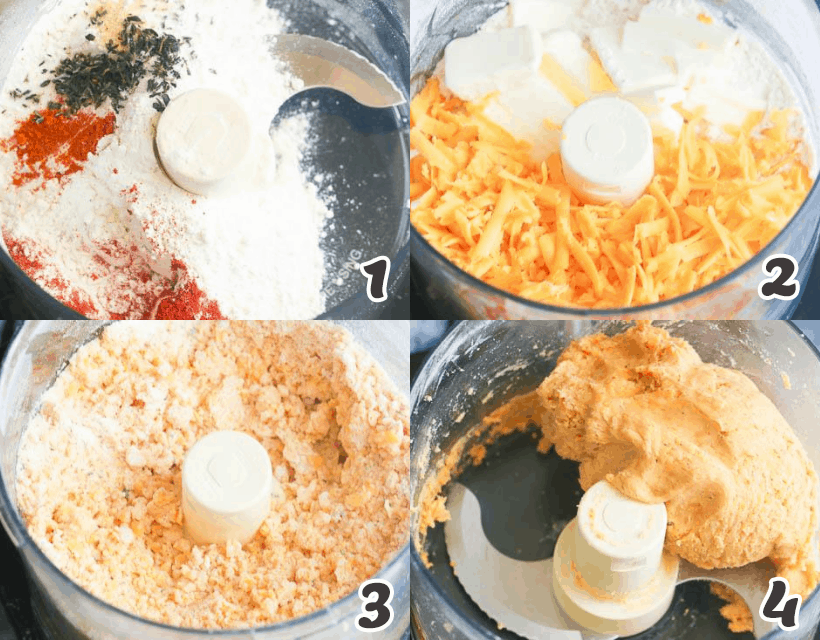
- Mix Dry Ingredients – In a food processor, add the dry ingredients: flour, baking powder, salt, paprika, thyme, garlic powder, and a pinch of black pepper. Mix until all are combined.
- Add Cheese and Butter – Add the shredded cheese and cubed butter to the food processor. Pulse for 15-20 seconds until it resembles coarse sand.
- Pulse – Pour in the water one tablespoon at a time. Then keep pulsing until it forms a soft dough.
Shape the Cheese Straws
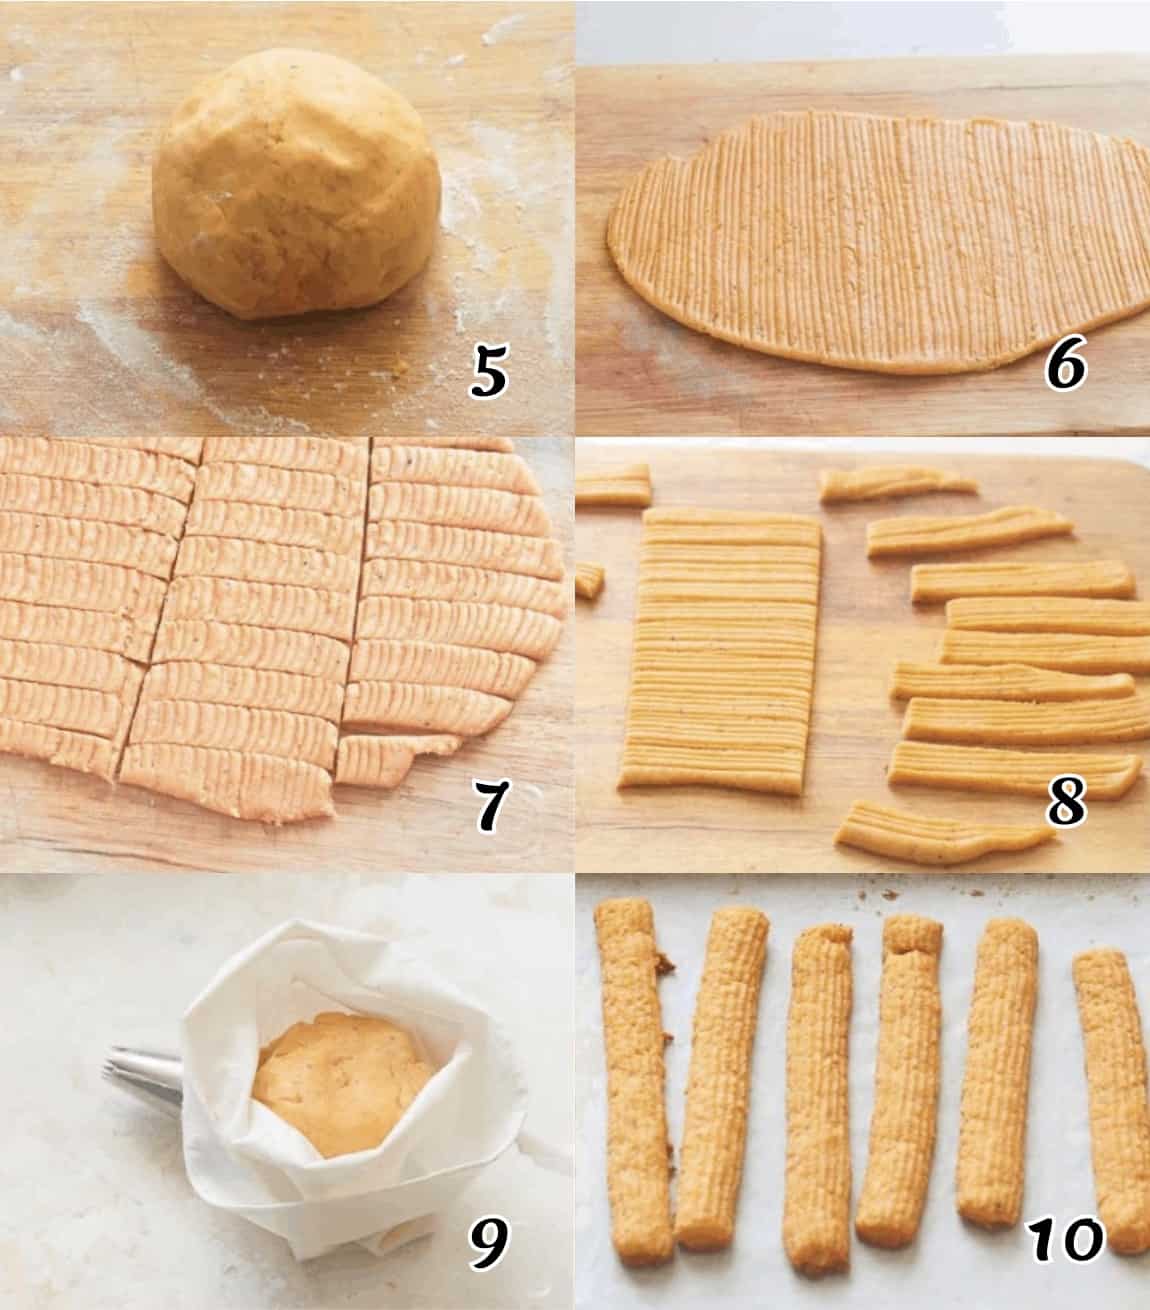
- Transfer – Place the dough onto the floured surface.
- Roll the Dough – Use a rolling pin to roll the dough to about ¼ inch thick. Then use a fork to run through some lines on the dough.
- Shape – Cut the dough into strips, and transfer them to a parchment-lined baking sheet on a single layer. Alternatively, you can use a piping bag and pipe it directly onto the baking sheet.
- Bake for 20-25 minutes until the edges are golden brown. Take them out and let them cool first. Enjoy!
Recipe Variations
- Cheese Options – You can substitute the sharp cheddar with any cheese you have on hand, but hard cheeses or cheese that melts, like Gouda and Gruyere, will help your cheese straws hold their shape while baking.
- Seasonings – You can use rosemary or parsley instead of thyme. Creole seasoning also makes amazing cheese straws.
- Extra Flavor – Adding crispy bacon bits will make this cheese straws recipe more exciting and entertaining. Diced sun-dried tomatoes are another delicious variation.
- Sweet Version – Replace savory thyme, paprika, garlic, and black pepper with a pinch of sugar, cinnamon, cloves, and nutmeg for a sweet experience. Experimenting with flavors in the kitchen is always exciting, don’t you think?
Tips and Tricks
- Experiment with different piping tips to create more textures and fun shapes.
- Use a pastry cutter or fork if you don’t have a food processor.
- Refrain from overworking the dough because it may get sticky. But the extra flour from the working surface will firm it up. It will also come together once you flatten it with a rolling pin.
- Try combining cheese and puff pastry for a shortcut.
Make-Ahead and Storage Instructions
You’ll enjoy this recipe more often than you think, especially after seeing how convenient they are to make ahead. Oh yes! You can make the dough as instructed and then store the unbaked dough for a week in the fridge or a month in the freezer.
On the other hand, baked cheese straws will stay fresh in an airtight container for a week (if they even last that long because they never do at mine!). Or you can freeze them for three months.
There’s no need to reheat them, just let them thaw in the fridge and then bring them to room temperature. If they lose some of their crispness, just toast them in the oven for a few minutes.
FAQs
Honestly, you don’t need a cookie press (that cool tool that squeezes out cookies) to make cheese straws, but it is fun. I didn’t use one. Just roll out the dough and slice it into straw shapes or use a piping bag instead. I bet you roll it out to ⅛-inch thick and use a cookie cutter to make cheese crackers.
Absolutely yes! And they are freezer-friendly, too. You can make a big batch and store them in the freezer for three months. That way, you’ll have ready-to-eat cheese straws in no time on the go. You could also freeze the dough for a month, thaw it, and bake it when the craving hits.
A major factor would be underbaking the cheese straws or baking them at too low a temperature. Or making the strips too thick. It should be about ¼-inch thick to get the right texture, and making it too thin will make it brittle and burn faster. Also, rest the baked cheese dough to allow the gluten to relax and make it easier to roll out.
What to Serve With Cheese Straws
Cheese straws are already great on their own. Or you can serve them with a glass of wine, cocktail, or beer. But if you want a full spread of snackable, you can also prepare the following to go with it.
More Easy Cheesy Recipes to Try
- Southern Baked Mac and Cheese
- Broccoli Cheese Soup
- Chili Cheese Fries
- Pimento Cheese
- Cheese Ball
- Cheesy Tuna Noodle Casserole
Conclusion
Delectably addictive cheese in a straw shape instead of a cracker makes a fun appetizer and snack! Would you love to have more exciting appetizer recipes? Then follow me on Facebook, Pinterest, and Instagram to find all my fave recipes!
This blog post was originally published in September 2020 and has been updated with additional tips.
Cheese Straws
Ingredients
- 1½ cups (180g) all-purpose flour
- ½ teaspoon (2g) baking powder
- ½ teaspoon (3.5g) salt
- ½ teaspoon (1g) paprika
- 1 teaspoon (0.5g) thyme, minced
- ¼ teaspoon (0.5g) garlic powder
- 1 pinch black pepper
- 2 cups (470g) extra sharp cheddar cheese, shredded
- 8 ounces (226g) butter, chilled and cubed
- 3 tablespoons (45ml) ice water
Instructions
Making the Dough
- Preheat the oven to 350℉/176°C.
- Line a baking sheet with parchment paper. Set aside.
- In a food processor, add the dry ingredients: flour, baking powder, salt, paprika, thyme, garlic powder, and a pinch of black pepper. Mix until all are combined.
- Next, add the shredded cheese and cubed butter to the food processor. Pulse for 15-20 seconds until it resembles coarse sand.
- Pour in the water one tablespoon at a time. Then keep pulsing until it forms a soft dough.
Forming the Cheese Straws
- Transfer the dough onto floured surface.
- Use a rolling pin to roll the dough to about ¼ inch thick. Then use a fork to run through some lines on the dough.
- Cut the dough into strips and transfer them in a parchment-lined baking sheet on a single layer. Alternatively, you can also use a piping bag and pipe it directly onto the baking sheet.
- Bake for 20-25 minutes until the edges are golden brown. Take them out and let them cool first. Enjoy!
Tips & Notes:
- Experiment with different piping tips to create more textures and fun shapes.
- Use a pastry cutter or fork if you don’t have a food processor.
- Refrain from overworking the dough because it may get sticky. But the extra flour from the working surface will firm it up and come together once you flatten it with a rolling pin.
- Try combining cheese and puff pastry for a shortcut.
- Please remember that nutritional information is a rough estimate and can vary significantly based on the products used.
Wanda says
I would like to pipe these onto a cookie sheet. It seems like the dough would be too thick to go through a piping bag tip. Please let me know if you have piped these successfully.
Imma says
Hi Wanda. I have never tried piping them. If anyone has tried, please comment:) I honestly don’t see why it wouldn’t work if you added just a little more liquid to the dough. However, I don’t know if the final product would be as crispy. And they may take longer to bake because of the higher moisture content.
TxRN says
Searching all around the web I landed here & I’m glad I did. Great recipe and tips & tricks, you covered it all. Very well done, thank you 🙂
Imma says
Oh great to hear that. Thank you so much!
Lois Morrison says
Can these be put in an air fryer?
Imma says
Yeah, absolutely you can make it in an air fryer as well. Can’t wait to know how it turns out for you.
Margie D Lawrence says
I have used this recipe for several years and I think it’s the best! I usually get my recipe for sausage balls out and make both for snacks or appetizers for Super Bowl celebration!
ImmaculateBites says
Great! Thanks for sharing this with us.
Don Edgerton says
Can you use Self-rising flour?
ImmaculateBites says
Yes you can. Omit the baking powder.
Danielle says
Should the cheese be kept cold? Or should I bring it to room temp before mixing?
ImmaculateBites says
Bring it to room temperature before mixing . Helps make it easier to mix.
Teresa says
How do I do them without a food processor?
ImmaculateBites says
You can try mixing them by hand or using a pastry cutter.
Billie says
These sound so good! I have never made these, but it so simple!!! Will be making soon!
Thanks!!
Carol says
Did you make these?
What date please??
How did they come out.
Pls respond.
Thanks