This sweet bright classic Lemon Tart with soft lemon curd filling and buttery crumbly crust is definitely a total melt-in-your-mouth experience. Add this easy treat to your arsenal of sweet, summery, bright, and sensational comfort food right away!
Contents…Classic Lemon Tart |
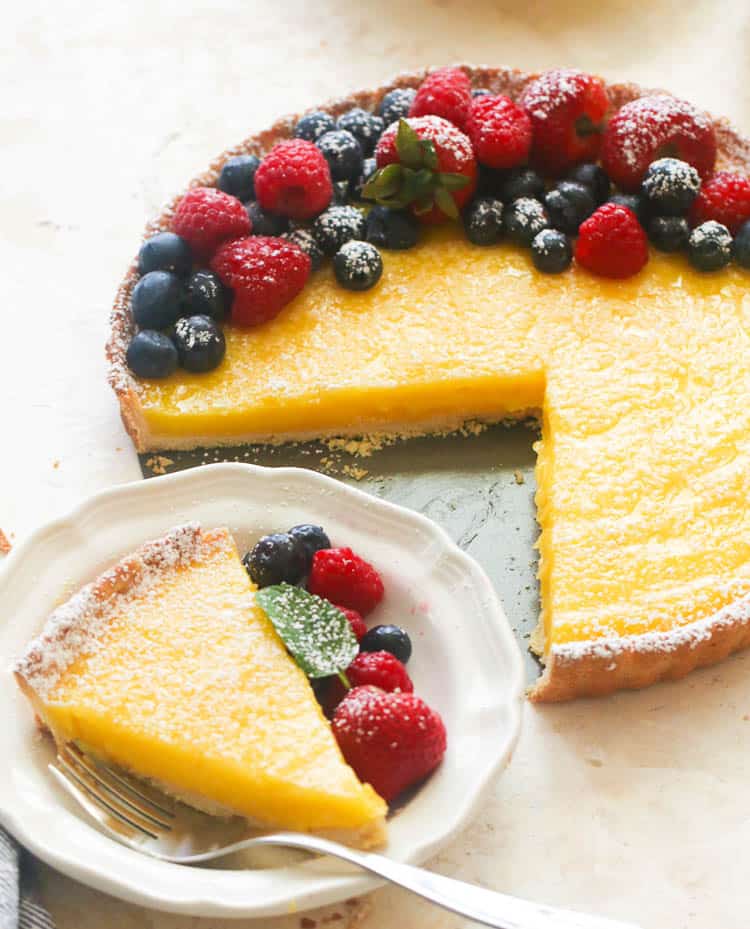
If you’re like me, with a fruity sweet tooth just waiting to sink into some delicious desserts, then this one’s for you. What I love about this easy lemon tart recipe is that you can play around with the toppings so you can serve both beautiful and delicious desserts. And I want to share that same experience with you, too!
Classic Lemon Tart
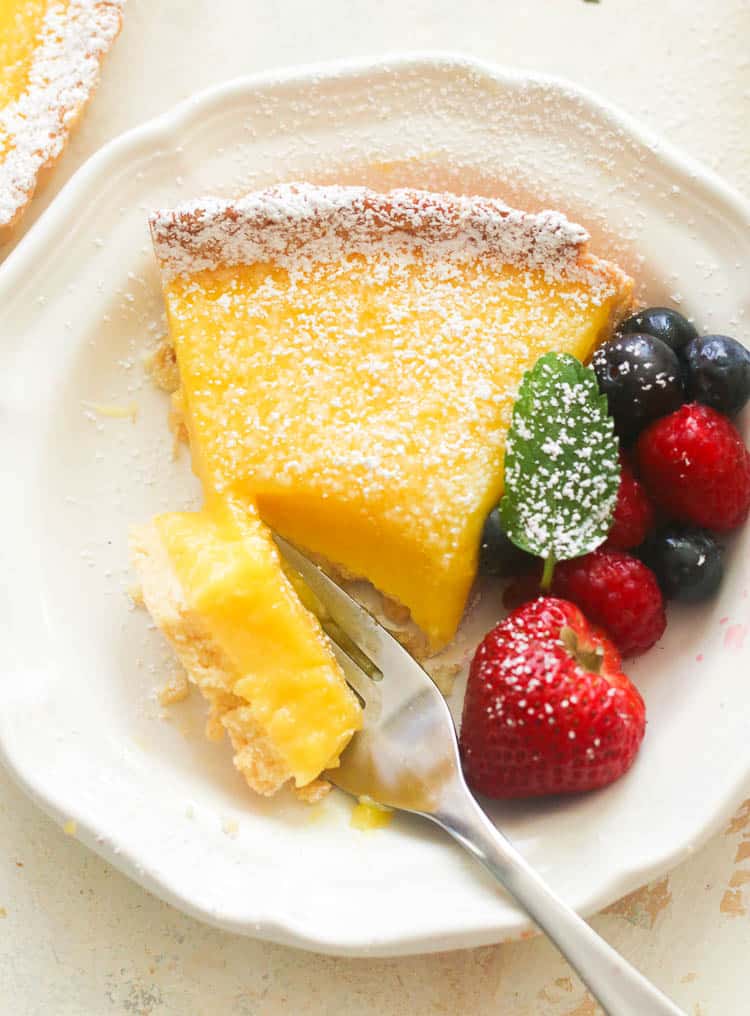
Tarte Au Citron is the French name for Lemon Tart, which during the old times, was served to a king as a token that symbolizes prosperity and integrity. The classic lemon tart consists of lemon-flavored filling and a crumbly-textured shortcrust pastry.
Pies vs Tarts
A tart is a culinary term derived from the French “Tarte” which literally translates to pie. (Whaaat?? Okay, keep reading.) However, there is a distinctive difference between the two.
A tart is made out of 3 parts which are the shortbread crust, the filling, and the toppings which totally depends on your preference. In a nutshell, pies are covered with a thin sheet of dough while tarts are open and topped with fruits.

Recipe Ingredients
This pastry may look that daunting to make, but it’s actually easier than you think it is. Here’s what you need for this summer treat.
- Tart Crust – rich in flavor because of its butter content. It has a coarse texture when made which you can easily press on to baking pans to mold it.
Lemon Curd
- Lemon – use around 4 pieces, then zest it first before juicing to make the most out of it! And of course, it gives the overall citrusy flavor for this tart.
- Granulated Sugar – a staple ingredient in every dessert, pastry, and baking. It adds a nice sweetness to it and that lovely golden brown caramelization.
- Salt – this adds flavor to the crust and also enhances the sweet and tangy flavors of the lemon curd.
- Unsalted Butter – cut it into small pieces so it’d easily blend in when making the lemon curd. I used unsalted butter because, yep you’ve guessed it, coz we already have salt in the recipe.
- Eggs – it gives a rich flavor and binds the ingredients for making the lemon curd filling. But always make sure to keep them at room temperature. See “Tips And Tricks” section below.
Recipe Variations
- Jam Tart – use jam instead of fresh fruits as the filling. Baking this will make the sugars in the jam caramelize; slightly giving you a sweeter taste.
- Meringue Tart – with its cloudy fluffy soft topping and custardy filling, this dessert is best served during the holidays. What I personally like about this variant is the slightly burnt meringue topping that really brings out a caramel delight.
- Tartlet – is a miniature version of the regular pastry. It’s usually a bite-sized cup with tasty fillings. So if you want to showcase your crust instead, this is the best option because it often comes with a larger crust to filling ratio.
Tips and Tricks
- Eggs should be at room temperature. This is to easily incorporate the eggs with other ingredients.
- Use cling wrap for storing the curd. Using a cling wrap to cover the surface of the curd ensures that there is no space between the two. This will prevent the top layer of the curd to oxidize creating a skin or a layer of dried curd.
- Eat it while it’s freshly made. Tarts are best consumed the day it is made. So don’t let it sit out on the table for far too long!
- Whisking. The smooth custardy texture of this lemon tart can be achieved by whisking constantly until the mixture thickens to a pudding-like consistency.
- Don’t let the Lemon Curd boil. Letting your curd boil will result in a curdled texture and that leaves a bad texture on your mouth.
Serving and Storage Instructions
Freezer
- Unbaked Crust – form it to tart crust shapes by gently pressing the dough onto the baking pan then freeze it for 3 months. This solidifies the butter making a sturdier crust.
- Lemon Curd – The right way to freeze it is to let it rest until it reaches room temperature, especially when using a sealed container as this might create moisture for bacterial growth. This will make your filling last for up to 2 months when properly done. Simply thaw it out and use it immediately when ready.
- Baked Lemon Tart – transfer it in an airtight container or freezer-safe bag then keep frozen for 1 month.
Refrigerator
- Baked Lemon Tart – transfer any leftovers to an airtight container and keep refrigerated for 2 days.
- Lemon Curd – for the leftover curd, you can store it in an airtight container and keep it refrigerated for up to 4 weeks.
- Tart Dough – wrap it with cling wrap and transfer to an airtight container and keep refrigerated for 3 days.
Reheating
Before reheating it, you must make sure to set the lemon tart is at room temperature. Then bake it in a 240℉ preheated oven for 12-15 minutes until warm. Serve and enjoy!
FAQs
Continuously stirring while heating the lemon curd on low-medium heat will help you achieve a pudding-like consistency.
The reason could be that it’s not cooked enough to stop amylase (digestive enzyme) in the egg yolks from destroying the amylose, which is a binding agent. So, to solve the problem, you need to make the lemon curd boil for an extra minute and not exceeding that time to avoid curdling.
Make sure to chill the lemon curd after cooking, just like how gelatin would firm up when it’s already cold.😉 Alternatively, if it still did not set after refrigerating then it means that you should cook it further until it’s hot (but do not boil).
Yes, you can, but this will result in a softer tart crust because of the absence of gluten that gives it the texture.
More Easy Desserts
How To Make Lemon Tart
Tart Crust
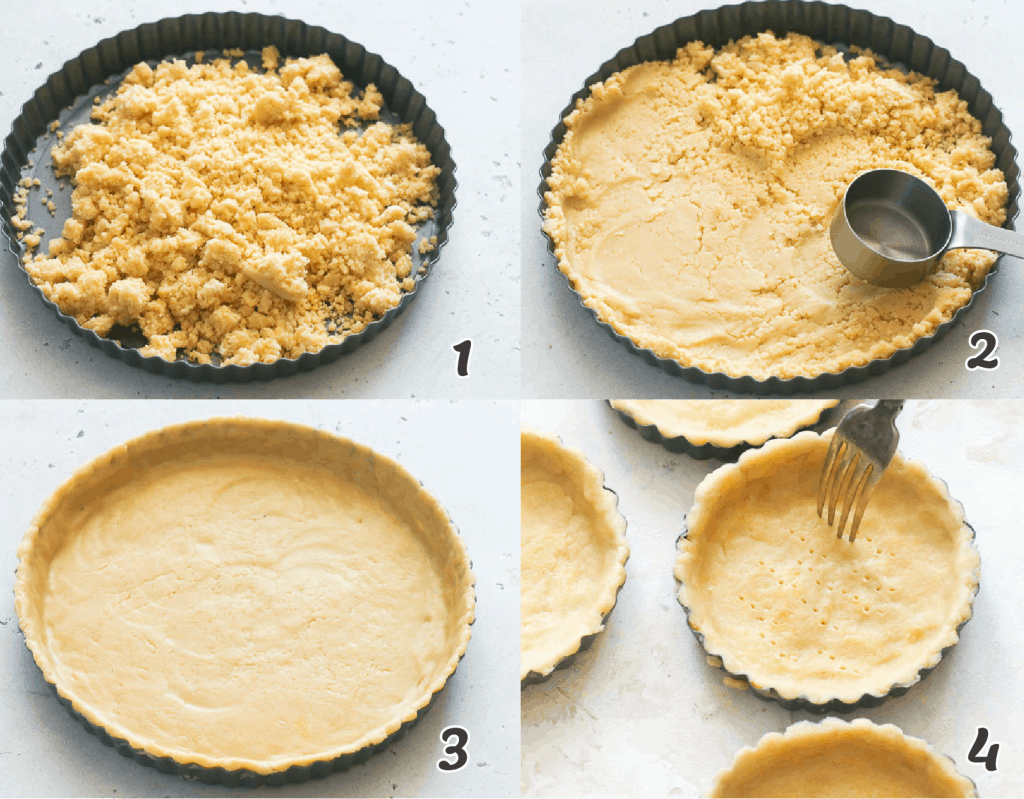
- Make the tart crust. Prepare your homemade tart crust in the pie/tart pan. See the full recipe and instructions here 一Tart Crust. (Photos 1-4)
- Bake the tart crust. While baking the crust, you can now start preparing the lemon curd filling.
Lemon Curd Filling
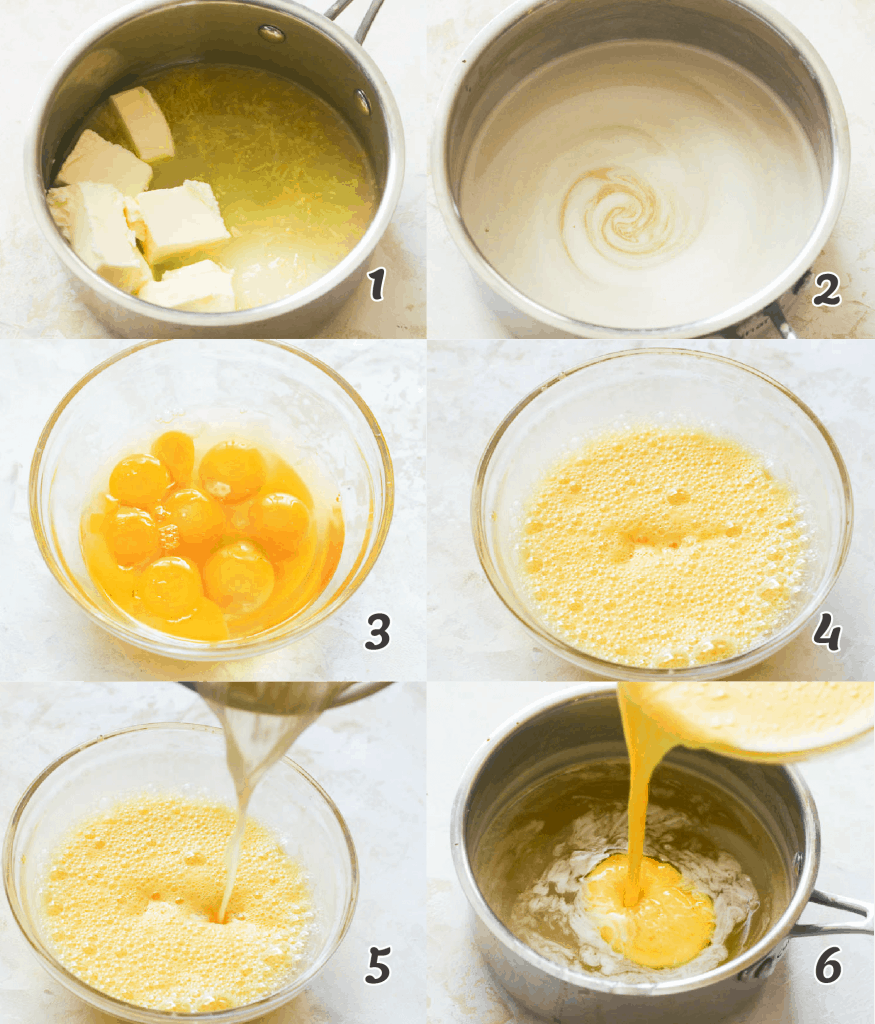
- Cook the lemon and butter mixture. In a medium saucepan, combine lemon juice and zest, sugar, salt, and butter. Place the saucepan over medium heat, stirring, until sugar is dissolved, and butter melted. Set aside. (Photos 1-2)
- Temper the egg mixture. In a large mixing bowl, combine eggs and egg yolks until blended. Temper the egg mixture by adding a little of the butter mixture to the eggs. You do not want to cook the eggs. (Photos 3-5)
- Add the tempered egg mixture to the butter mixture. Return tempered egg mixture to saucepan, and place over low heat. Whisk constantly until the mixture thickens to a pudding-like consistency; do not let it boil, or the lemon curd will curdle. Remove from heat and continue to stir to stop the cooking. (Photo 6)
- Transfer the lemon curd to a bowl. Cover the surface with plastic wrap, and let it cool for at least an hour. (Or you can store it at this point in an airtight container and in the fridge for up to 2 weeks, or frozen for up to 2 months.)
Lemon Tart Assembly
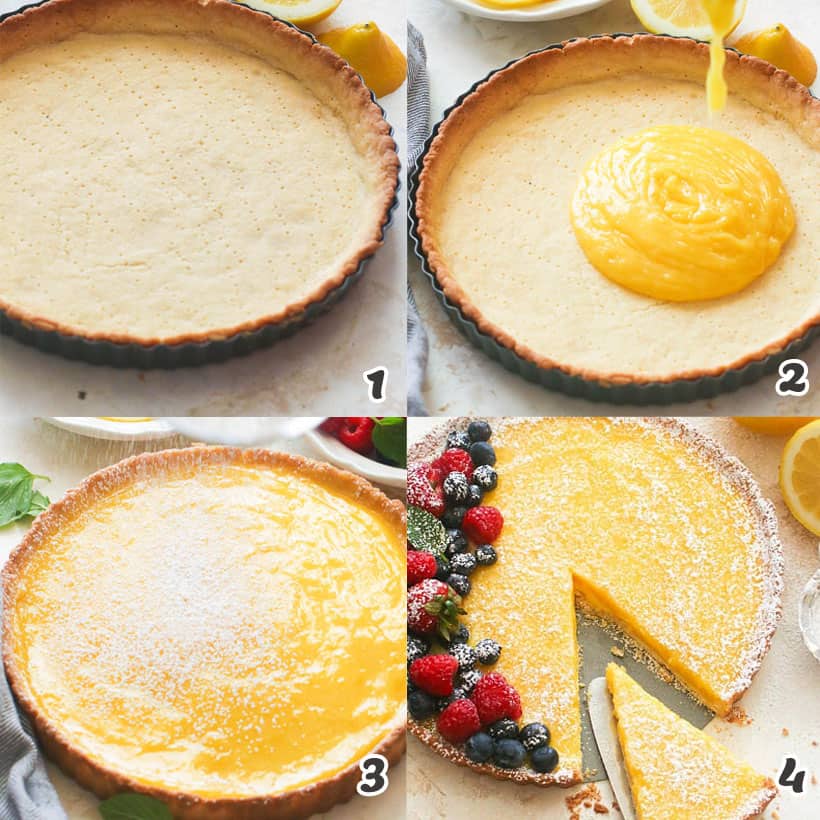
- Fill the tart crust with lemon curd and chill. Once it has cooled down at room temperature, fill the baked tart crust with the lemon curd and refrigerate for 3-4 hours or until the curd is chilled. (Photos 1-3)
- Add the toppings. You can cover it with powdered sugar and top it with your favorite berries. (Photo 4)
Watch How to Make it
[adthrive-in-post-video-player video-id=”Dl1K2eCH” upload-date=”2021-08-22T15:03:31.000Z” name=”LEMON TART” description=”This sweet bright classic Lemon Tart with soft lemon curd filling and buttery crumbly crust is definitely a total melt-in-your-mouth experience. Add this easy treat to your arsenal of sweet, summery, bright, and sensational comfort food right away!” player-type=”static”]
This blog post was first published in August 2020 and has been updated with additional tips and a video.
Lemon Tart
Ingredients
Lemon Curd
- ½ – ¾ cup (120 ml) freshly squeezed lemon juice
- 3-4 lemons , for the juice and the zest
- 1 cup (200 g) sugar
- ⅛ teaspoon (0.6 g) salt
- ½ cup (1 stick or 113 g) unsalted butter , at room temperature
- 3 large eggs
- 5 large egg yolks , at room temperature
- homemade tart crust
Instructions
Tart Crust
- Make the tart crust. Prepare your homemade tart crust in the pie/tart pan. See the full recipe and instructions here 一Tart Crust.
- Bake the tart crust. While baking the crust, you can now start preparing the lemon curd filling.
Lemon Curd Filling
- Cook the lemon and butter mixture. In a medium saucepan, combine lemon juice and zest, sugar, salt, and butter. Place the saucepan over medium heat, stirring, until sugar is dissolved, and butter melted. Set aside.
- Temper the egg mixture. In a large mixing bowl, combine eggs and egg yolks until blended. Temper the egg mixture by adding a little of the butter mixture to the eggs. You do not want to cook the eggs.
- Add the tempered egg mixture to the butter mixture. Return tempered egg mixture to saucepan, and place over low heat. Whisk constantly until the mixture thickens to a pudding-like consistency; do not let it boil, or the lemon curd will curdle. Remove from heat and continue to stir to stop the cooking.
- Transfer the lemon curd to a bowl. Cover the surface with plastic wrap, and let it cool for at least an hour. (Or you can store it at this point in an airtight container and in the fridge for up to 2 weeks, or frozen for up to 2 months.)
Lemon Tart Assembly
- Fill the tart crust with lemon curd and chill. Once it has cooled down at room temperature, fill the baked tart crust with the lemon curd and refrigerate for 3-4 hours or until the curd is chilled.
- Add the toppings. You can cover it with powdered sugar and top it with your favorite berries.
Tips & Notes:
- Can I make it ahead? Yes, you can. Have the unbaked crust formed in tart crust shapes by gently pressing the dough onto the baking pan then freeze it. As for the lemon filling, let it rest until it reaches room temperature, especially when using a sealed container as this might create moisture for bacterial growth. This will make your filling last for up to 2 months in the freezer, or 2 weeks in the fridge.
- How to store tarts? Simply leave them room temperature overnight and, when you’re ready, just pop it in the oven to crisp the crust again.
- Tartlet is a miniature version of the regular pastry. It’s usually a bite-sized cup with tasty fillings. This is the best option if you want to showcase your crust because it often comes with a larger crust to filling ratio.
- Please keep in mind that nutritional information is a rough estimate and can vary greatly based on products used.

Paula says
I am thinking of making this for a friends birthday, but she is gluten free. Can I replace the a/p flour in the crust with gluten free flour?
ImmaculateBites says
Hi Paula! I can’t say for sure on the gluten free flour as I’ve only made this with all purpose flour . Maybe another reader can answer your question.
Wendy says
Wow! Imma, que ricooooooo!. Fotos super lindas. Besitos
Jillian Morland-Duff says
In the UK we call the individual ones Jam Tarts.