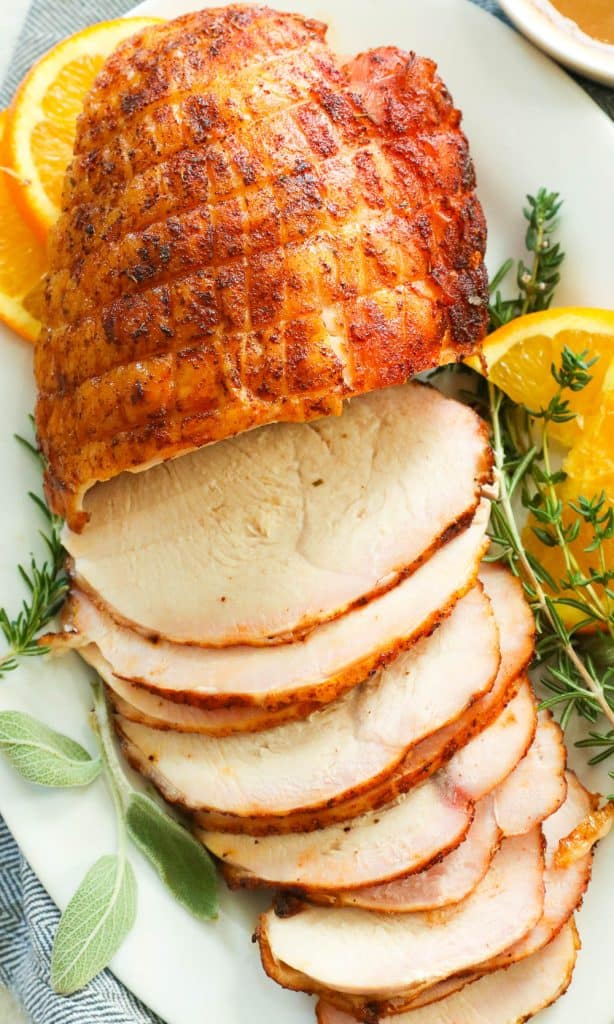
Moist, flavorful, and perfectly tender Smoked Turkey Breast makes a simple and incredibly tasty meal, down to the bone! The best part about it is that it’s super easy to make! This fantastic recipe will surely steal the show, whether it’s for a summer cookout or a holiday feast.

A lot of you guys likely stay away from turkey breast when preparing a feast for a crowd, and I don’t blame you. This part of most poultry is often bland and dry.
Luckily this smoked turkey breast recipe pushes a hefty amount of flavor down to the meat’s core. It’s all about the preparation and cooking method, not necessarily about the ingredients.

Picking the Best Turkey Breast
Buying turkey is just like buying any kind of meat. You always want it fresh. However, there are certain rules for turkey, so you don’t make your guest sick with it. Here are my notes on buying turkey breast in particular:
- Buy frozen: Frozen poultry usually means the quality is preserved. Freezing meats also often kills off some harmful bacteria that could make your meat go bad quicker.
- Check the texture: If you buy a fresh turkey or leave it out for a few hours to thaw, the possibility of spoilage increases. One sure sign is a slimy film on the surface of the meat. Avoid that one at all costs.
- Take a good sniff: As with most raw food, it shouldn’t smell like anything. So if you get a hint of rotten eggs or sulfur, sorry, it’s time to pitch it.
How to Smoke Turkey Breast
Brine vs. Inject, Which is Better?
When adding flavor to smoked turkey breast, you have two options. One is traditional wet brining, where you submerge your turkey in a saline solution with your choice of seasonings; the other is injecting the meat with succulent flavors.
Traditional brining evenly flavors the whole turkey breast, but it takes time to reach the middle. And it takes a lot of space in the fridge, which isn’t ideal during the holiday season.
For inexperienced cooks, smoking the turkey immediately after brining results in super moist meat. However, the skin tends to be a bit pale and doesn’t crisp up. You can pat the turkey breast dry with a paper towel before placing it in the smoker to prevent this.
Injecting a brine solution, on the other hand, infuses the flavors deep within the meat immediately. Unfortunately, it doesn’t flavor the meat evenly.
Some parts may become too saturated with moisture, while other parts are bland and dry. But, since the brine is injected under the skin, the skin usually browns better and cooks crispier.
Rub
On the other hand, brining a turkey is optional. The best way to dry brine turkey breasts is to rub a good amount of spices under the skin.
Technically this is still brining since it initiates the meat-flavoring process. A dry rub often results in flavorful meat at the surface and a more natural flavor at the core.

What Smoker to Use?
From pellet smokers to charcoal grills, there are tons of ways to smoke a turkey breast. The bottom line here is that the meat cooks perfectly to the core. Nobody want’s cold turkey.😬
Here are some methods to smoke this baby the easy way.
Pellet Smoker
Pros
- Easy Tenderizing – Although this might take a while, the meat tenderizes as it cooks.
- Flavored Wood Chips – I love experimenting with different flavor mixes. The woodchips add a distinct flavor to the turkey breast.
- Indirect Heat – This uses indirect heat, which means the heat source is distant from the meat, so it cooks evenly.
Con
- Pellet Smokers can be Bulky – It’s a big chunk of machinery, and it takes a bit of space.
How to use it?
- Placing the Meat – You simply place the meat on a rack over the indirect heat source. This will make sure that your meat will cook evenly without one side burning.
- Installing the Water Pan – Add a pan with half a cup of water to the smoking chamber to prevent it from drying out. This method also infuses the flavor of the wood chips into the turkey breast. (Personally, I think hickory-flavored wood is excellent for poultry, but feel free to mix and match.)
- Catching the Heat – Close the lid and start cooking!
Although it takes longer to smoke meat in a pellet smoker, you’ll surely taste its deliciously distinct flavor. Pellets are compressed and flavored woodchips that burn slightly, filling the chamber with flavorful smoke. The heat source is further from the meat than a grill, so your meat cooks more evenly without burning.
Verdict: By far, this is the easiest way to smoke. It automatically feeds the heater with pellets and circulates the heat around the chamber. No need to get dirty; just check the meat from time to time!👍
I love using my Traeger Pellet Smoker for smoked turkey breast because it’s so efficient. And I get to smoke the sides, too, while my main dish cooks. I often get my woodchips from Traeger, but Kingsford’s woodchips are a great alternative.
Charcoal Grill
Pros
- Compact Unit – The grill takes little space when using it and storing it.
- No Electricity – Go green with this smoker because you don’t need electricity for this method. You can enjoy your Smoked Turkey Breast even when you’re in the great outdoors.
- Low Cost – It’s super easy to clean and doesn’t require much maintenance.
Con
- Direct heat – Even though technically it’s indirect, the heat source is in the same chamber as the meat. Unfortunately, this can lead to roasting rather than smoking. It also requires a little more attention so that one side of the meat doesn’t burn.
This is the perfect smoker for you if you don’t have much space in your backyard. However, I wouldn’t wear white when using this if I were you. Aside from the hot coals that you’re using to smoke, it’s also super easy to stain your shirt with soot.
This smoking method uses charcoal, which cooks the meat with low but direct heat. You can also use flavored wood to infuse a smoky aroma to the center of the meat!
Barbecuing vs. Smoking – The difference between barbecuing and smoking is that smoking uses slow, indirect heat so that all sides cook perfectly. Barbecuing is usually direct heat on an open fire.
How to use your Charcoal Grill as a Smoker
- Heat the Charcoal – Place the hot coals on one extreme side of the grill.
- Catch those Dripping Juices – Add a tin catch just below the grill so you can catch any juices that drip off.
- Picture Perfect Placement – Place the turkey breasts on the other side of the grill furthest from the coals, then place the water pan beside it.
- Trap the Heat – Close the lid because you want all that heat to cook your meat.
Verdict: I like using this method tho because it’s the most convenient. I don’t need a bulky unit in my backyard. 👍 All I have to do is take my favorite wood flavor and use it along with charcoal. Don’t wear white when you’re using this method, lol.
Electric Smoker
Pros
- No Direct Heat – We won’t be using an open fire for this smoker. It’s just woodchips and some heating rods.
- Built-In Thermometer – It has a built-in thermometer so you can see what the temperature is inside the smoker.
Cons
- Longer Smoking Time – It cooks longer and slower because of the low maximum temperature.
- Electricity Consumption – I think you should expect a higher electric bill when using this smoker since the unit will consume electricity for hours.
- Different Taste – Without the authentic smoke from burning woodchips, you’ll sense a slight difference in the taste. Also, if you don’t preheat the smoker, you may taste a bit of the plastic manufacturing residue.
Electric smokers use wood chips to produce smoke via heating rods. It also uses convection heat, which gives the food a different flavor due to the lack of genuine fire. The parts are generally similar to a bullet smoker with the wood tray substituting the fire chamber.
How to use it?
- Preheat the Smoker – Pre-smoke the unit with the woodchips of your choice.
- Attach the Water Pan – Place the water pan in the unit’s lowest space once it reaches the desired temperature.
- Perfect Placement – Place the turkey on the rack and close the lid or door to start smoking.
NOTE: If it’s the first time you’re using this type of smoker, I suggest seasoning your grill with cooking oil first. This helps remove any manufacturing residue.
Verdict: Electric grills tend to cook at a lower temperature which means they cook longer. I like this method as well because it’s so easy to navigate!

Recipe Ingredients
Poultry breast has a poor reputation of tasting bland and dry. It doesn’t have to be that way! As a home chef, I wouldn’t let any meal without taste and texture out of my kitchen.
This is why the simple ingredients for this recipe add just the right amount of flavor to tickle your taste buds.
- Turkey Breasts – The leanest part of the bird that’s great for meal plans and diet restrictions.
- Creole Seasoning – A combination of dried herbs and spices that gives authentic Cajun flavor to your dish. And it’s so simple to make it at home with this easy recipe.
- Salt – A fundamental ingredient that enhances other flavors. It’s also perfect for preserving, brining, or a light garnish.
Italian Seasoning is an excellent rub for this smoked turkey breast recipe, but Poultry Seasoning comes in a close second. You can even try using Blackened Seasoning if you want that strong smoked taste deep in the turkey breasts.
Tips and Tricks for Smoking Turkey Breast
- Don’t wash the turkey – Surprise, right? Water can spread bacteria that would usually be killed by the heat. And you don’t want to contaminate your turkey. But do make sure to wash your hands well.
- Temperature, not jiggle – Whether the meat jiggles or wiggles to the touch is not a good indication that it’s done. It’s much better to use an instant-read thermometer, so you’re sure the internal temperature has reached at least 165℉/74℃. Then you know it’s done. You can actually take it out of the smoker once it gets to 160℉/72℃, and the residual heat will continue to cook it.
- Use within two days – Once you thaw the turkey breast, it’s best to cook it within two days for quality and freshness.

Serving Suggestions
You’d be surprised at what you can pair with this dish. You can turn any typical day into a magical holiday with wonderful sides. Here are my top picks for the perfect pairings for this dish.
- Obviously, potatoes! But Rosemary Roasted Potatoes makes it truly complete.
- The mild flavors of Rice Pilaf perfectly complement the smoky flavors of this dish.
- A simple Scalloped Corn Casserole is also a great side for smoked turkey breast. The sweetness of the casserole gives a different dimension to the whole dish.
- To really make it a holiday of holidays, a serving of Homemade Cranberry Sauce should do the trick.
More Terrific Turkey Recipes
How to Smoke a Turkey Breast
Prepare the Turkey
- Get the Turkey Ready – Remove turkey breast from packaging and put it on a baking sheet.
- Brine the Turkey Breast – Let it brine for around 3-4 hours. (Rule of Thumb: Let the turkey breast sit in the brine for an hour per pound.) Once done, take it out and remove the excess moisture.
- Dry It – Let it sit in the fridge for a minimum of three hours or preferably overnight. Do not cover it; let it air-dry. You can omit this part and proceed with the spices if you’re in a rush.
- Preheat the Smoker: When ready to smoke, preheat the smoker to 250℉/120℃, using wood of choice.

Season the Turkey Breast
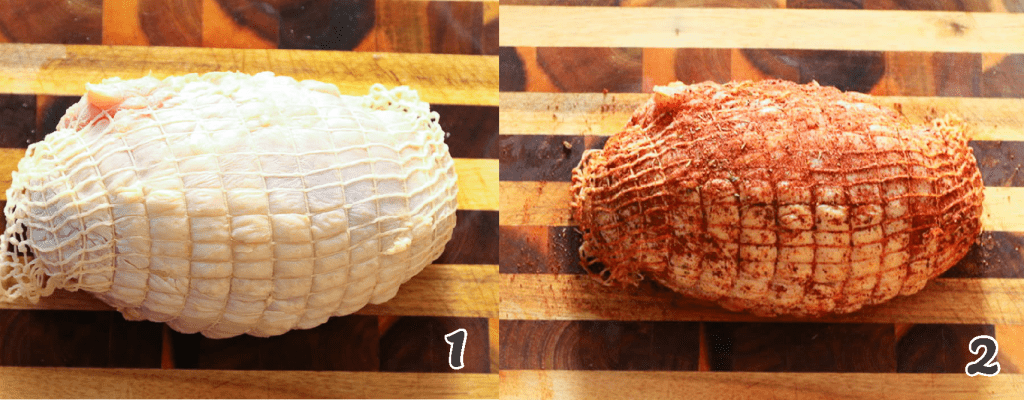
- Season – Place the turkey breast in a large bowl with all the spices and then drizzle with oil. (Feel free to use your preferred seasoning if that’s what you have on hand.) (Photos 1 & 2)

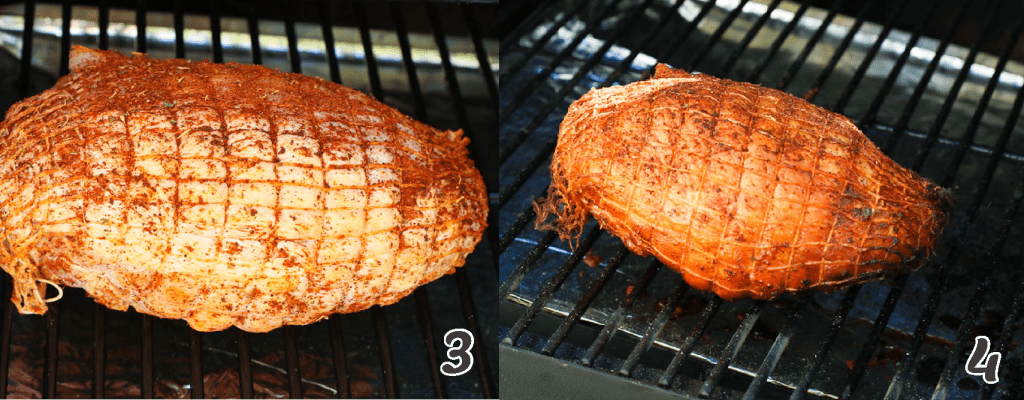
- Placement – You can place turkey breast directly on the smoker racks. (Photo 3)
Smoke the Turkey Breast
- Trap the heat – Cover the smoker and smoke the turkey breast for about 90 minutes and then move it around for even cooking. Some parts of the smoker can be hotter than other parts. Use your best judgment. (Photo 4)
- Check the temperature – Smoke until the turkey breast reaches an internal temperature of 165℉/75℃, ensuring the thermometer doesn’t touch the bone.
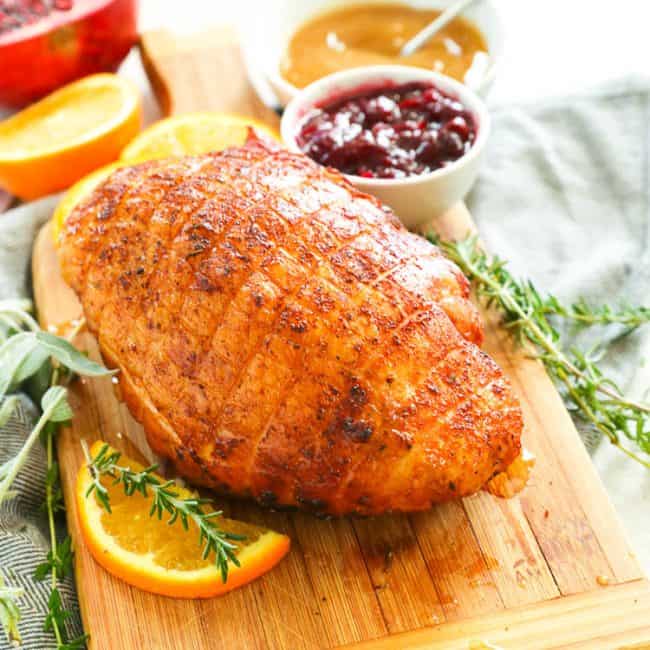
- Remove and Serve: When the turkey is done, remove it from the smoker and immediately pair it with the cranberry sauce and a side of mashed potatoes.

Smoked Turkey Breast
Ingredients
- 4 pound turkey breast
- salt, to taste
- seasoning of choice, Creole, poultry, blackened, or Italian seasoning
Instructions
Prepare the Turkey Breast
- Get the Turkey Ready – Remove turkey breast from packaging and put it on a baking sheet.
- Brine the Turkey Breast – Let it brine for around 3-4 hours. (Rule of Thumb: Let the turkey breast sit in the brine for an hour per pound.) Once done, take it out and remove the excess moisture.
- Dry It – Let it sit in the fridge for a minimum of three hours or preferably overnight. Do not cover it; let it air-dry. You can omit this part and proceed with the spices if you're in a rush.
- Preheat the Smoker: When ready to smoke, preheat the smoker to 250℉/120℃, using wood of choice.
Season The Turkey Breast
- Season – Place the turkey breast in a large bowl with all the spices and then drizzle with oil. (Feel free to use your preferred seasoning if that's what you have on hand.)
- Placement – You can place turkey breast directly on the smoker racks.
Smoking the Turkey
- Trap the Heat – Cover the smoker, smoke the turkey breast for about 90 minutes, and then move it around for even cooking. Some parts of the smoker can be hotter than other parts. Use your best judgment.
- Check the Temperature – Smoke until the turkey breast reaches an internal temperature of 165℉/75℃, ensuring the thermometer doesn't touch the bone.
- Remove and Serve: When the turkey is done, remove it from the smoker and immediately pair it with the cranberry sauce and a side of mashed potatoes.
Tips & Notes:
- Don’t wash the turkey: Surprise, right? Water can spread bacteria that the heat would usually kill. And you don’t want to contaminate your turkey. But do make sure to wash your hands well.
- Temperature, not jiggle: Whether the meat jiggles or wiggles to the touch is not a good indication that it’s done. It’s much better to use an instant-read thermometer, so you’re sure the internal temperature has reached at least 165℉/74℃. Then you know it’s done. You can actually take it out of the smoker once it gets to 160℉/72℃, and the residual heat will continue to cook it.
- Use within two days – Once you thaw the turkey breast, it’s best to cook it within two days for quality and freshness.
- As with most raw food, it shouldn’t smell like anything at all. So of you get a hint of rotten eggs or sulfur, steer away from that.
- Please keep in mind that the nutritional information is a rough estimate and can vary significantly based on the products used in the recipe.


Leave a Review