Chapati Recipe – Flaky, layered, and super satisfying flatbread with only five simple ingredients tastes way better than store-bought. The mild, nutty flavor is ideal for beef stew and other meat or veggie dishes. And what better way to relieve stress than kneading bread?
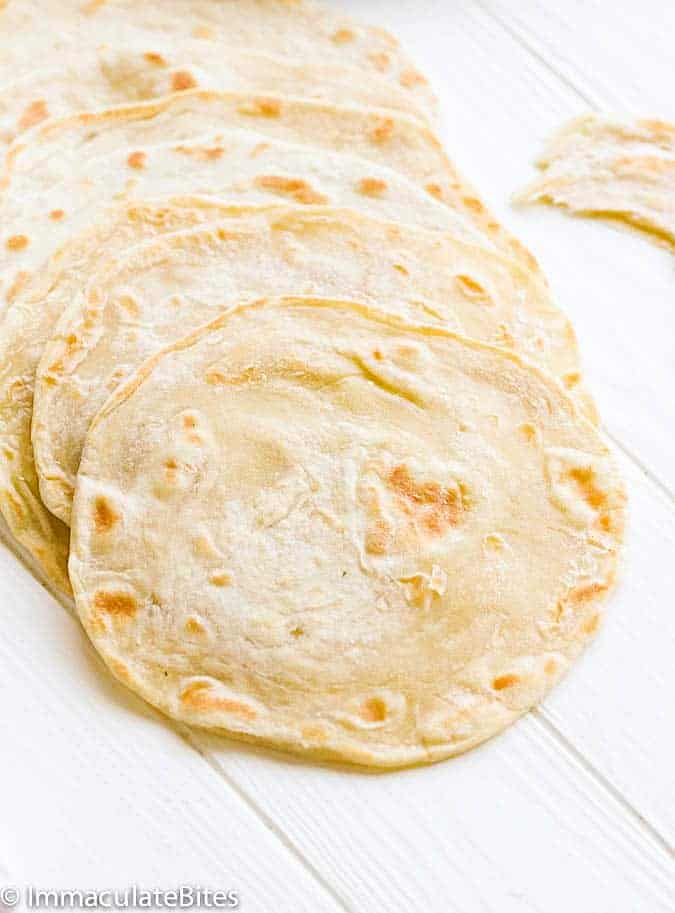
This delightful recipe for chapati is super simple to throw together with just five ingredients and a little patience. Rolling and coiling the dough for a flaky flatbread is so worth the little time it takes. And it’s a must-have side for any East African dish.
I love kneading chapati dough because it’s so relaxing. Plus, it develops the gluten for that satisfying chew we enjoy with flatbreads. Then the coil makes it light and flaky, and brushing the outer layers with oil gives it a delicately crispy edge.
Where Does Chapati Come From?
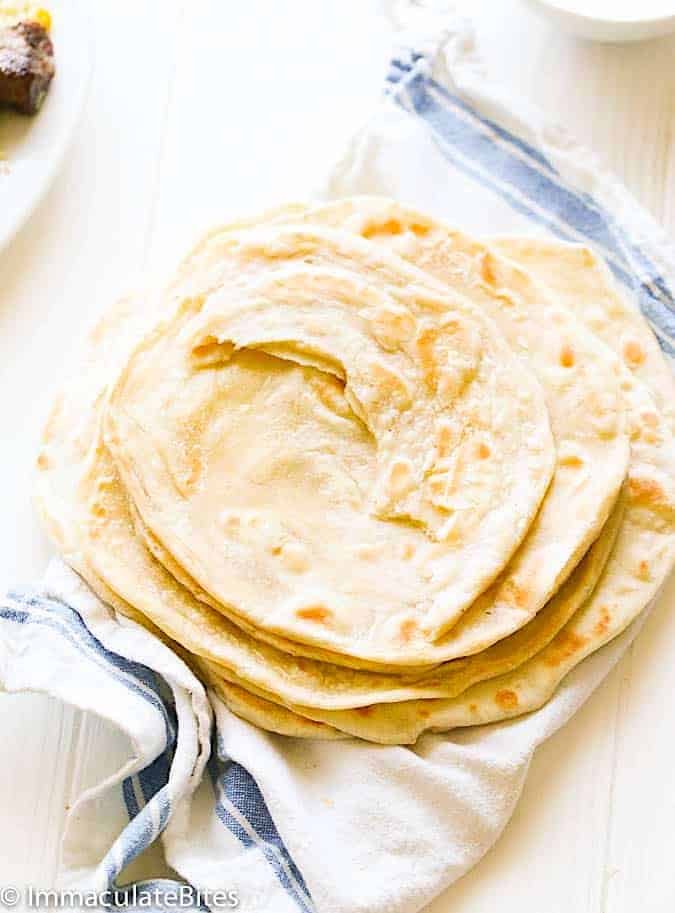
If you’ve tried East African food, especially from Tanzania, Uganda, Mozambique, Kenya, and Burundi, you are familiar with the unleavened pan-grilled bread—chapati. It’s different from the Indian chapati recipe because it’s coiled and also enjoys the deliciousness of either ghee or oil. Most say it was born in Egypt and has been in the East African culinary heritage for millenniums.😍
Recipe Ingredients
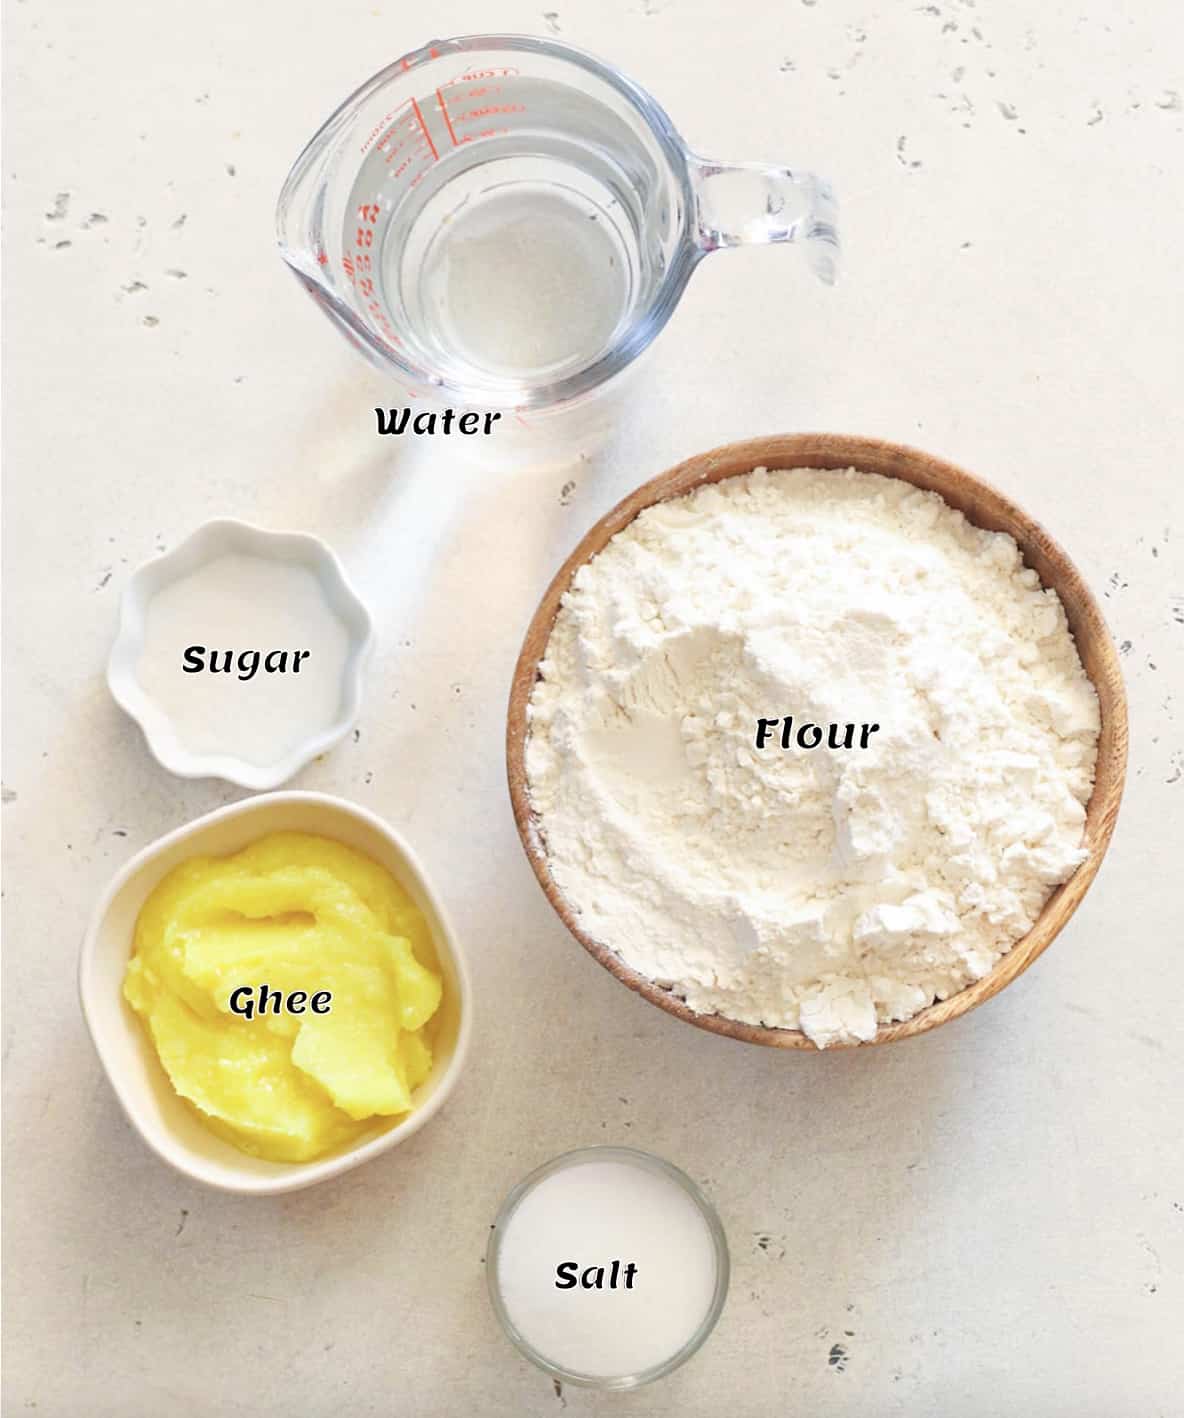
- Flour – For the base of the dough, I prefer all-purpose flour because it’s easier to work with.
- Ghee – For more flavorful and aromatic chapatis, ghee is the best. It also softens the texture and provides a lightly crispy outer layer.
How to Make Chapati
Prep the Dough
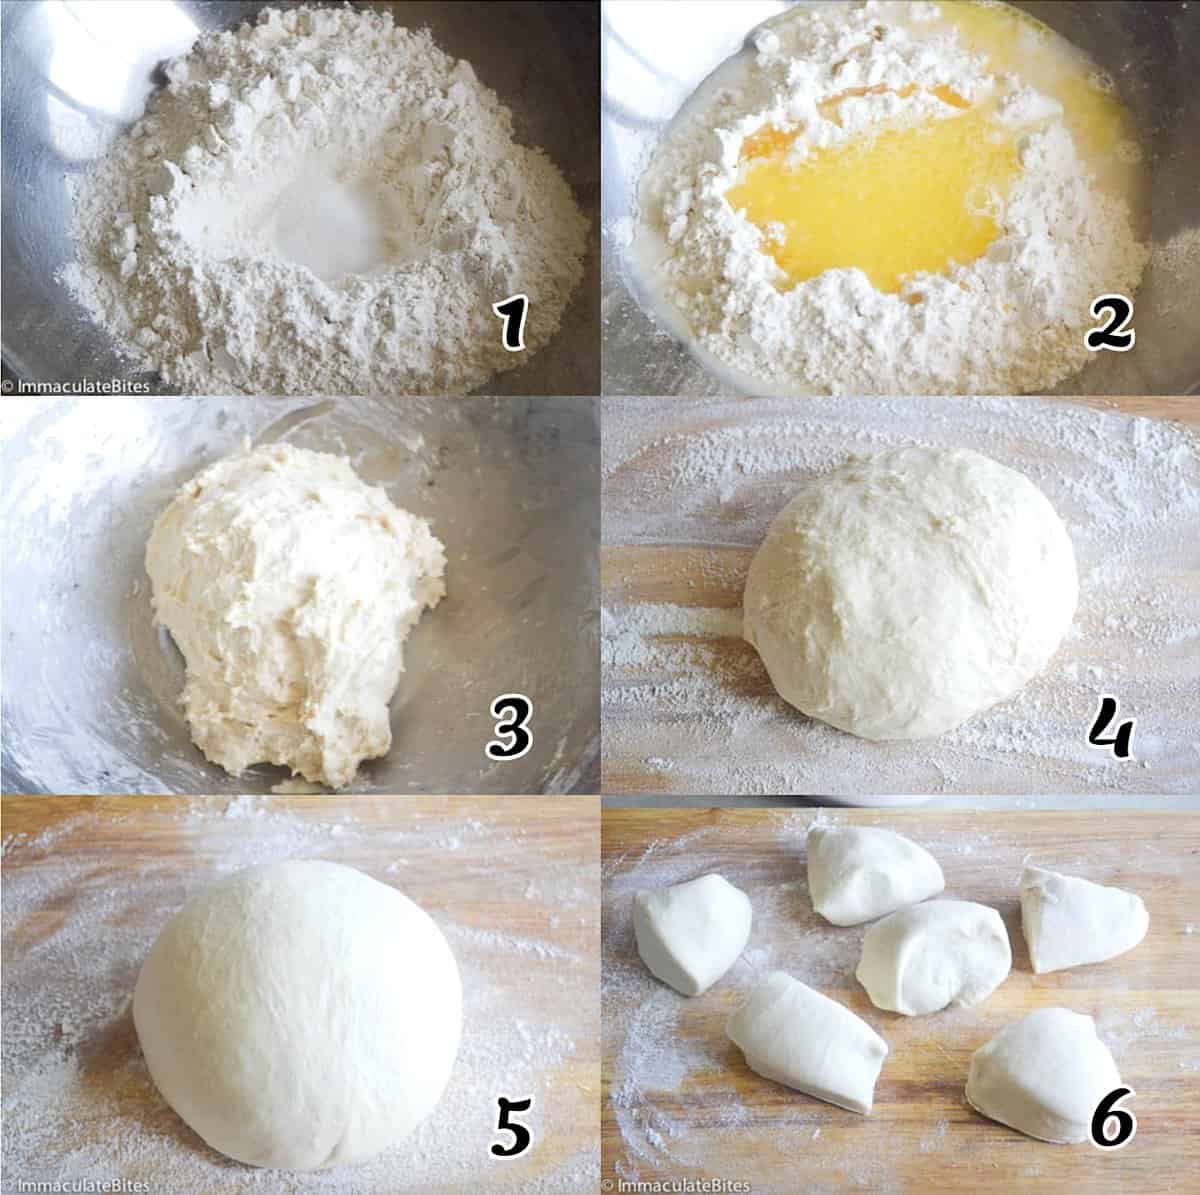
- Mix – In a large bowl, add flour and make a well, then add sugar and salt, followed by water, ghee, or oil. (Photos 1-2)
- Knead to form a soft and sticky dough. Place the dough on a heavily floured board and knead for about 8-10 minutes. Continue adding flour as needed while kneading to keep it from sticking. Be careful not to overdo it; your dough should be soft, elastic, and smooth. (Photos 3-5)
- Rest – Divide the dough into 6-8 pieces according to how large or small you want your chapatis, and let it rest. Resting the dough relaxes the gluten, making it easier to work with and producing tender chapati. (Photo 6)
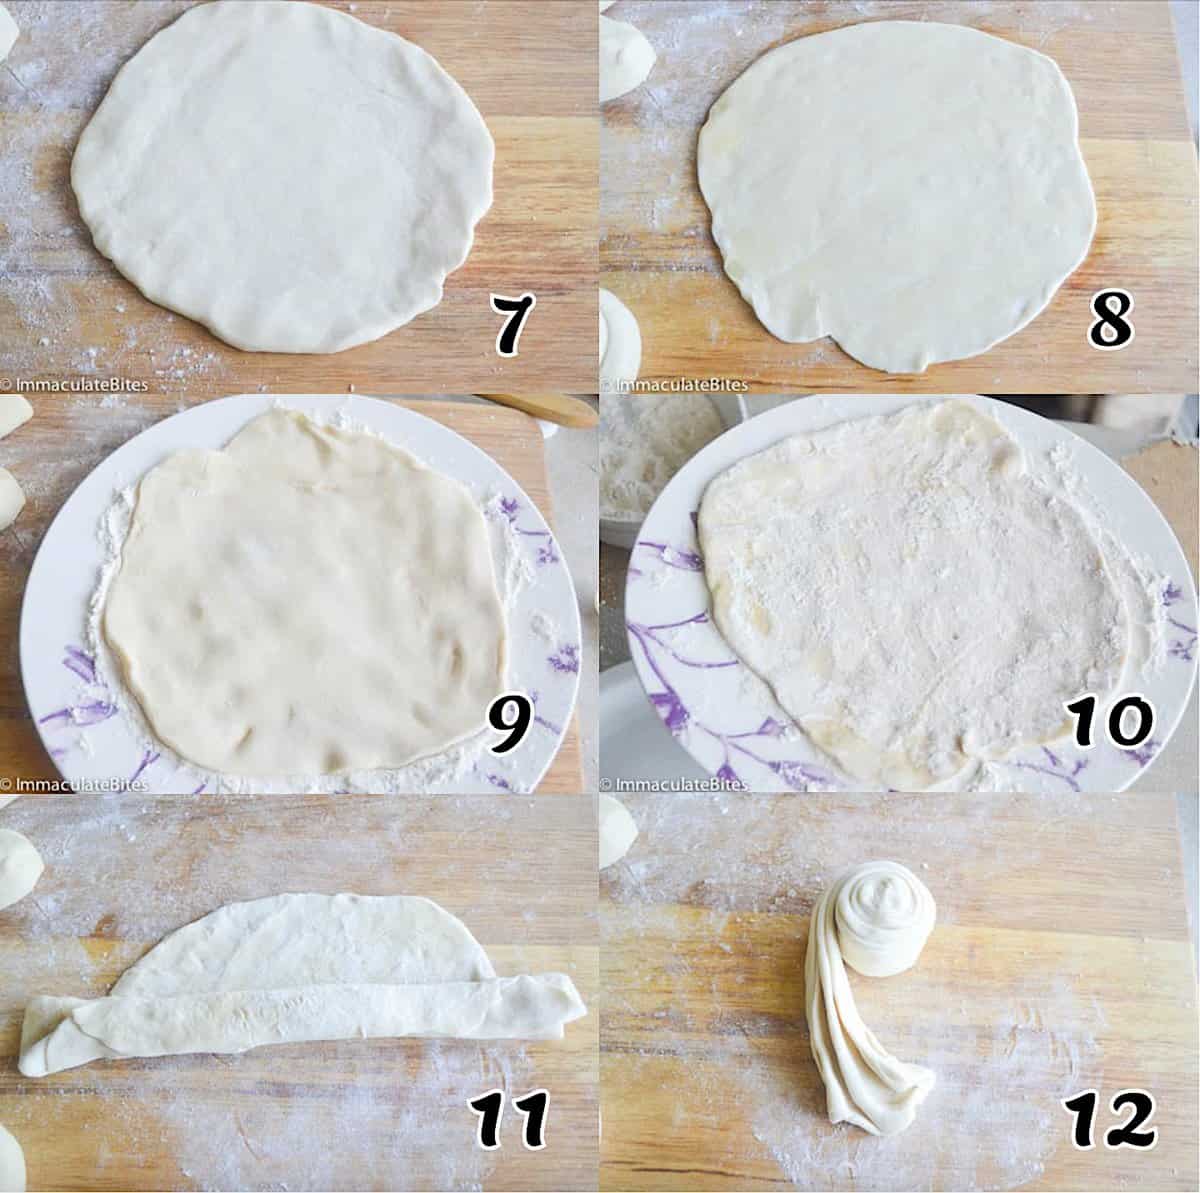
- Roll – Roll out the dough into a circle with a rolling pin. They don’t have to be perfect. (Photo 7)
Coil the Chapati
- Layering – At this stage, you may proceed to cook. However, if you want coiled chapatis, continue with the following steps.
- Grease – Lightly oil chapati dough with ghee. Be gentle with the oil. (Photo 8)
- Press – Then place dough on a heavily floured plate and press it down. (Photos 9-10)
- Shake Excess Flour – Turn the dough over and press down – lightly shake off excess flour.
Shape It
- Form – Shape dough like you would shape a paper fan – Starting at one end and all the way to the opposite end. (Photo 11)
- Coil – Then coil it up like in the picture. (Photo 12)
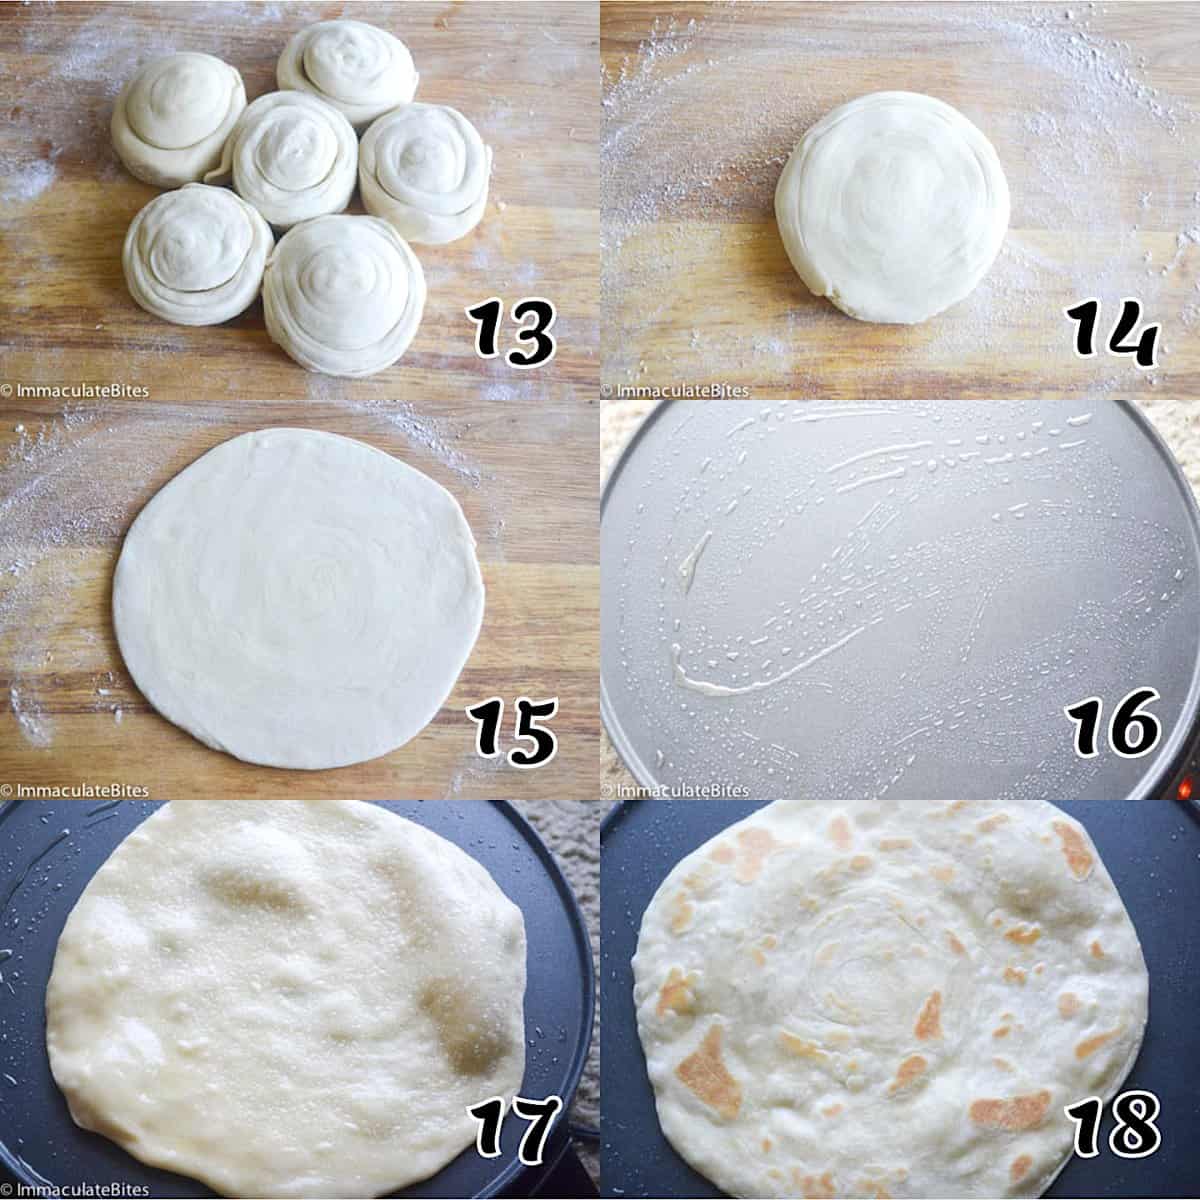
- Rest – When all the dough has been coiled, cover it with a damp cloth and let it rest for 20 minutes. (Photo 13)
- Roll – Gently flatten the coiled dough and roll it out. Begin rolling the dough from the center, working outwards. (Photos 14-15)
- Make a Circle – Rotate the dough each time you roll it so you can make a circle. But don’t roll it out too much because chapatis aren’t meant to be thin—about ¼-inch thick works.
Cook the Chapati
- Oil Pan – Then place the dough on the pan (I used a crepe pan, but a skillet works too). (Photo 16)
- Prep Bread – Heavily oil the other side of the dough, making sure you also get the edges.
- Fry – Cook for 2-3 minutes, rotating as needed until golden brown. (Photos 17-18)
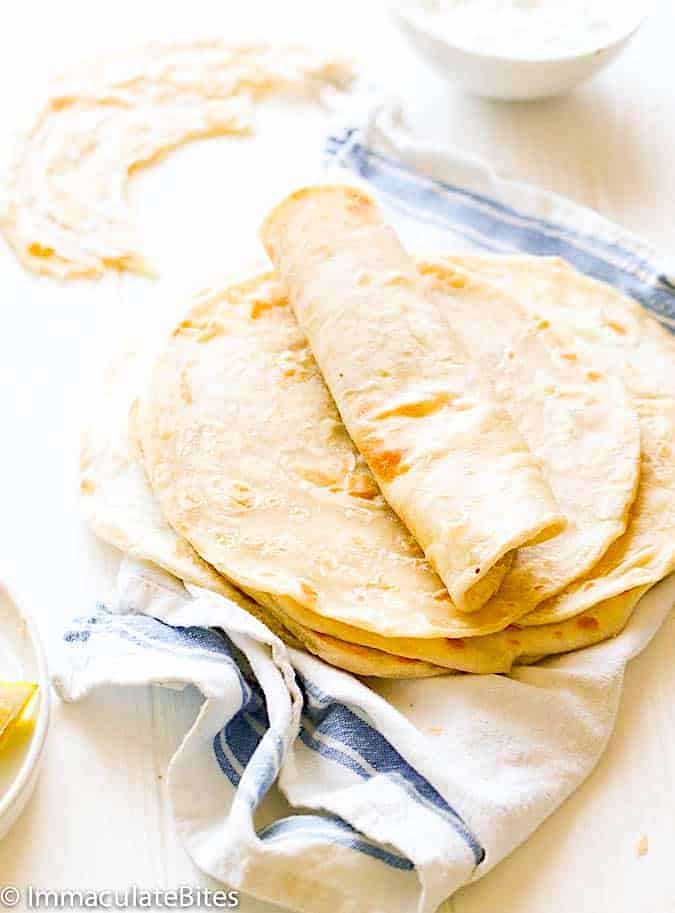
- Serve warm.
Recipe Variations
- Veggie-Infused – You can add grated veggies, such as carrots, squash, and potatoes, to the dough, like in Kenyan chapatis or vegetable omelets in Uganda.
- Softer Bread – Use a 50/50 water-to-milk ratio to make softer flatbreads.
- Stuffed Chapatis – Aside from veggies, you can add grated cheese and egg while cooking the chapatis.
Tips and Tricks
- The right amount of kneading is crucial because gluten won’t develop well without it, changing the texture. Also, oil makes the chapati soft and prevents it from drying out.
- Lukewarm water creates a smoother, more supple dough, but remember to add it gradually so the dough doesn’t get too wet.
- Resting time is also essential since it makes the dough easier to roll without breaking apart.
- Be careful not to overcook it. A non-stick pan helps prevent the bread from sticking and burning.
Make-Ahead Instructions
You can make the dough ahead, then transfer it to a covered bowl and refrigerate it for 24 hours. Allow it to rest at room temperature for an hour before rolling it into individual chapatis.
Or you can freeze the raw dough or chapatis for three months. Allow the dough to thaw and come at room temperature before cooking.
Serving and Storage Instructions
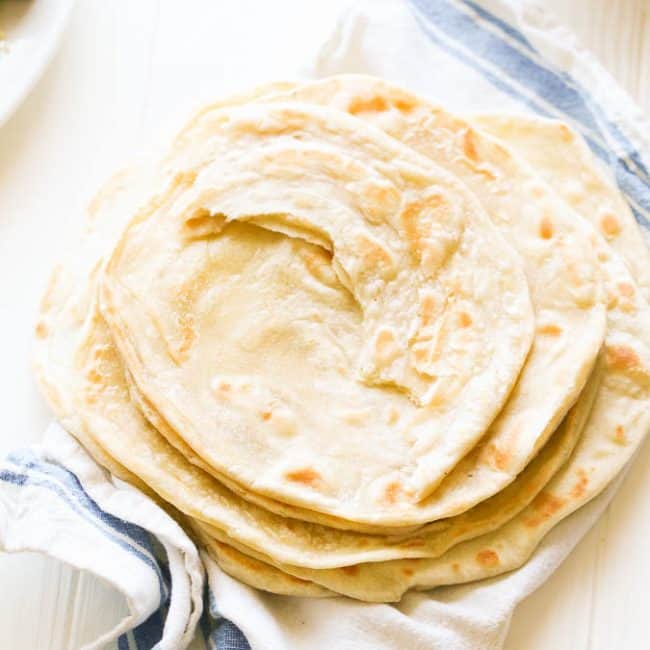
Chapati is best fresh, but you can keep leftovers in an airtight container or freezer-safe resealable bag. It’ll keep in the fridge for four days. Alternatively, you can freeze it for 3-4 months. Thaw the bread in the refrigerator overnight or on the kitchen countertop for an hour before reheating.
Reheat in a hot skillet for 30 seconds. You could wrap them in a paper towel and zap them in the microwave on medium-low for a few seconds, but the skillet is better. Serve them with your favorite dishes, such as chicken curry and Ethiopian lentil stew.

FAQs
Chapati is simply bread. However, English speakers usually use the word chapati because it specifies what kind of bread—fried flat bread, either from East Africa or India.
Both roti and chapati are unleavened bread, but they differ in terms of cooking process and content. When cooking chapati, we oil both sides, while for roti, we only grease one side.
The name suggests that it originated in India. However, it is believed to have arrived in India from East Africa, specifically Egypt. Regardless of where it really came from, it’s delicious.
Mouthwatering Recipes You Can Use With Chapati
Chapati is tasty all by itself, but dip it in the curry chicken sauce or use it instead of a tortilla in a steak burrito for more deliciousness.
- Curry Channa and Aloo
- African Peanut Stew
- Ground Beef Curry
- Jamaican Curry Goat
- Crockpot Beef Tips & Rice
More Comforting Flatbread Recipes to Try
Conclusion
This simple East African chapati recipe is a sure winner because you only need basic ingredients. What are your favorite main dishes to go with flatbread? Let me know in the comments! ❤️
Watch How to Make It
This blog post was originally published in June 2014 and has been updated with additional tips, new photos, and a video.
[adthrive-in-post-video-player video-id=”1m5Y3sEi” upload-date=”2019-04-01T06:51:26.000Z” name=”East African Chapati” description=”East African Chapati- Easy to make chapati that are Flaky, layered and Delicious. Made with a few simple ingredients.”]
Chapati Recipe
Ingredients
- 3 cups all-purpose flour
- 1 teaspoon sugar
- 1½ teaspoons salt
- 3 tablespoons ghee (clarified butter or oil)
- 1¼ cup warm water
Instructions
- In a large bowl, add flour and make a well, then add sugar and salt, followed by water and ghee or oil.
- Knead to form a soft and sticky dough.
- Place dough on a heavily floured board and knead for 8-14 minutes. Continue to flour dough as needed to facilitate kneading. Be careful not to overdo it. The dough should be soft, elastic, and smooth.
- Divide dough into 6 or 8 pieces according to preference and let it rest. Resting helps to relax the gluten and makes it not only easier to work with but also produces tender chapati.
- Using a rolling pin, roll out the dough balls into a circle. They don't have to be perfect.
- At this stage, you may cook them. However, if you want chapatis with layers, follow the next steps.
- Lightly oil chapati dough with ghee. Be gentle.
- Then place the dough on a heavily floured plate, and press the dough down.
- Turn it over and press down again – lightly shake off excess flour.
- Shape dough like you would shape a paper fan – starting at one end and folding all the way to the opposite end.
- Then coil it up – like in the picture.
- When all the dough circles have been coiled, cover them with a damp cloth and let them rest for 20 minutes.
- Gently flatten each coiled ball and roll it out. Begin rolling from the center, working outwards.
- Rotate the dough out each time you roll it. That helps to make a perfect circle. Make sure they are not rolled out too thin. Chapatis are not meant to be thin – a ¼-inch thickness is good.
- Oil the pan. Then place the chapati on it. I used a crepe pan, but a skillet works just as well.
- Heavily oil the other side of the dough, making sure you oil the edges too.
- Cook for 2-3 minutes, rotating as needed until golden brown.
- Serve warm.
Tips & Notes:
- The right amount of kneading is crucial. Gluten won’t develop well without it, changing the texture. Also, oil makes the chapati soft and prevents it from drying out.
- Lukewarm water creates a smoother, more supple dough, but remember to add it gradually so the dough doesn’t get too wet.
- Resting time is also essential since it makes the dough easier to roll without breaking apart.
- Be careful not to overcook it. A non-stick pan helps prevent the bread from sticking and burning.
- Please remember that the nutritional information is a rough estimate and can vary significantly based on the products used in the recipe.

Beth Berk says
I love chapati! I’ve had it in Uganda! Can’t wait to try this recipe!
Imma says
Awesome!!! Can’t wait to know how it turns out for you.
Qinah says
Excellent recipe. Delicious!!!
Imma says
Aww. Thank you so much for your love 🙂
Nancy Nerland says
Can they be frozen and if so for how long. Having an event but need to make some things ahead .
imma africanbites says
Hi, Nancy. I freeze a lot of dough, but have never tried freezing this one. One of our readers though has tried freezing the dough and it went well. Just make sure it is completely thawed before using.
Busie says
I loved this recipe, it reminded me of my mum’s cooking
Immaculate Bites says
Thank you so much, Busie! 🙂
Ellie says
This is probably the best chapati recipe I’ve ever made. Super simple, beautifully flaky… I’m obsessed!
Immaculate Bites says
Thank you, Ellie! 🙂
Maria N says
Best chapo recipe ever
ImmaculateBites says
Thanks Maria
mrs. Domiscilla Wagner says
Thank you, I love this recipe.
erika says
my husband is igbo and grew up eating chapati. i am always looking for ways to make his favorite African foods so i made this recipe and he loved it! so easy to follow and the chapati is light and tender.
ImmaculateBites says
Glad to hear this. Thanks for taking time out to share your thoughts with us.
charmour says
I loved this recipe so much!thank you
shoba daniels says
Thank you for this recipe making it today 🙂
ImmaculateBites says
Great! Do let me know how it works out for you.
Hank Shaw says
Very much like a flour tortilla. Along those lines, I found that the result was very similar both with your method as well as the standard flour tortilla method, which is to work the fat in before adding the hot water. Doing this means you no longer need the coil technique to get flaky chapatis. I also used a tortilla press both times with both methods and it worked well — if you rest the individual balls of dough for 1 hour beforehand. Just a cool little hack that might save some time.
ImmaculateBites says
Thanks for taking time out to share this with us. Really appreciate it.
Duncan says
Is the rolled chapati supposed to be 1/4 inch or 1/4 cm. Inch seems a bit thick. Also are the “cups” mentioned “measuring cups” (approx 250ml) or typical cups we use for tea ?
ImmaculateBites says
They are measuring cups- not teacups. It’s 1/4 inch thick, if it’s too thick roll it out to desired thickness. And proceed with the next steps. Happy Cooking!!!
Clear says
I just want to thank you so much. I love your recipes so when I saw you had one for chapatis I Was sure I had found the solution, and sure enough! I was getting so frustrated cause mine were always coming out hard before .
I tried it today and they came out perfectly. I also was finally able to roll them all in circles lol!
I did it the layered way as recommended , but if I skip that step and just fry them up after kneading and letting to rest for 30 mins will they still come out as soft ? Thanks !
ImmaculateBites says
Hi, Clear! I am so glad this worked out for you. High-five on getting to roll them in circles lol :). And don’t worry, if you skip the layering step it will still come out soft.
clear says
lol you have no idea how happy i was! lol thanks so much. we tried your pilau rice and second time making the african chicken stew, love love love your recipes 🙂
Cheryl says
Turned out perfectly soft, thank you so much for the recipe and clear instructions. I used a combination of plain, strong white and atta flour in equal combinations and they came out soft and layered. A real treat and a happy husband who had been missing them. Thank you and I will be back 🙂
ImmaculateBites says
Yay! Thanks Cheryl